Invoicing on fmPilot 2
Once you log in, the first page is your Vendor Directory, under Clients click the Client name you need to invoice for

Then click on the work order number you want to work on
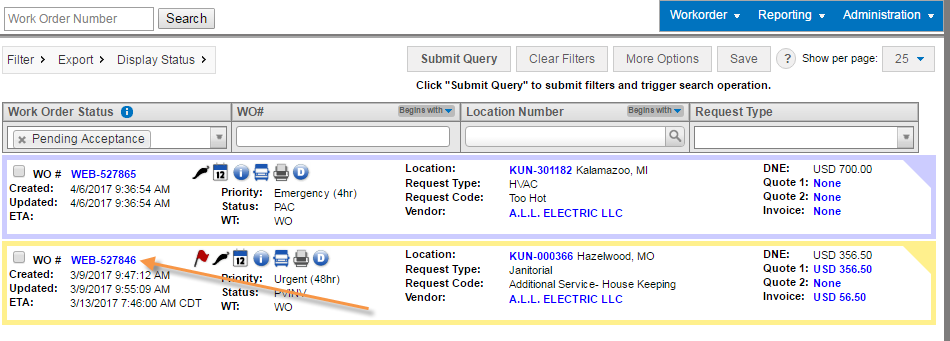
To invoice your work order must be in PVINV- Pending Vendor Invoice
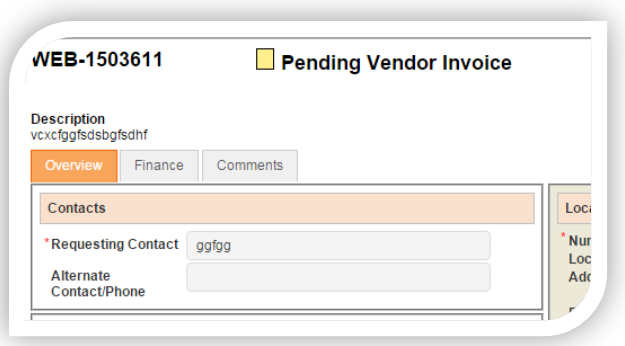
Click on the “Finance” tab then click “Add” OR the amount, located next to the word “Invoice”.
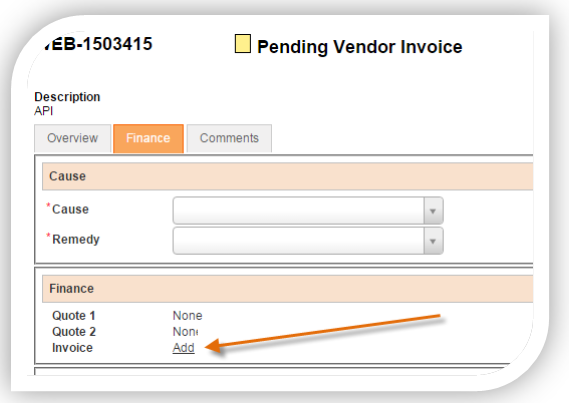
You are now in the “Invoice” screen.
1st) enter your Invoice Number #
Enter your Invoice # at the top right of your screen
Please remember that this is your invoice number that you would use in your internal billing system
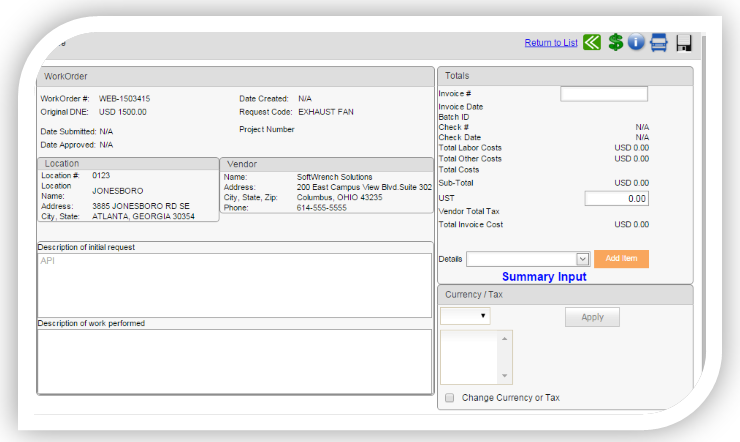
2nd) add Sales Tax
If there is applicable sales tax, it must be entered in the “UST or (GST, PST, HST)” field on the “Invoice” screen.
Note: Do not use the drop down tax option under the “Details” section. Also, your invoice number can only be numbers or letters no special characters will be accepted.
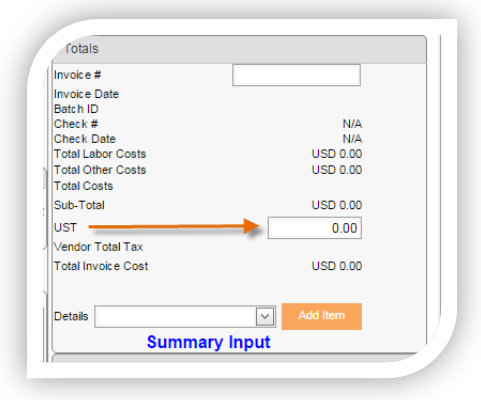
3rd) Add Description of Work Performed
All clients require a description of the services performed be entered on the Invoice. You cannot use more than 256 characters to describe the work.
If for some reason the job requires additional details please put “See Attached Form for Description” in this field and attach that supporting document to the work order.
4th) Enter invoice items - Labor
NOTE: Please make sure you break down all your line items, e.g. labor, materials and trip charge. Failure to do so may result in rejected invoices
From the “Details” drop down option, select the type of cost to be entered and then select the “Add Item” button.
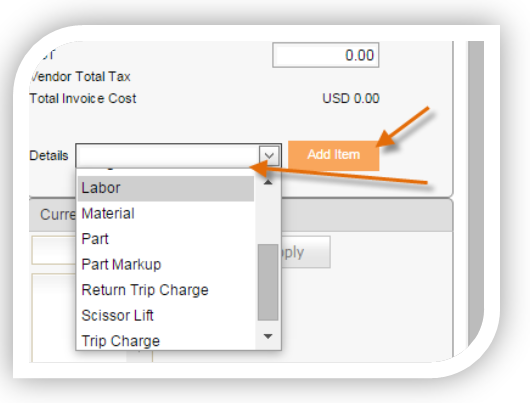
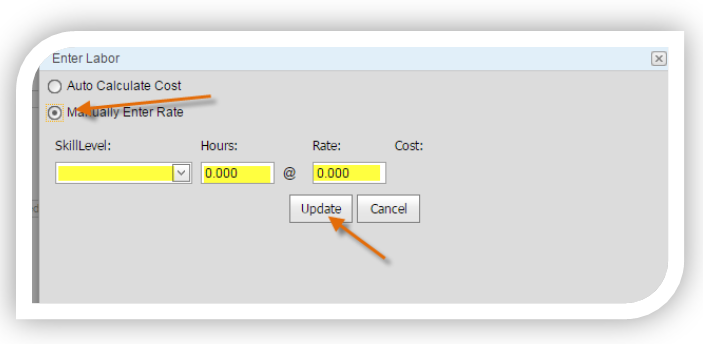
If you have to option to manually enter rate please mark the bubble next to manually enter rate.
- Select “Manually Calculate Rate”
- Select the number of “Hours”
- Select the “Rate”
- Then click “Update”
Invoicing – Entering Job Costs – Materials
Material
- Enter a “Description” of the material
- Enter a “Quantity”
- Enter a “Unit Cost” for each material
- Then click “Update”
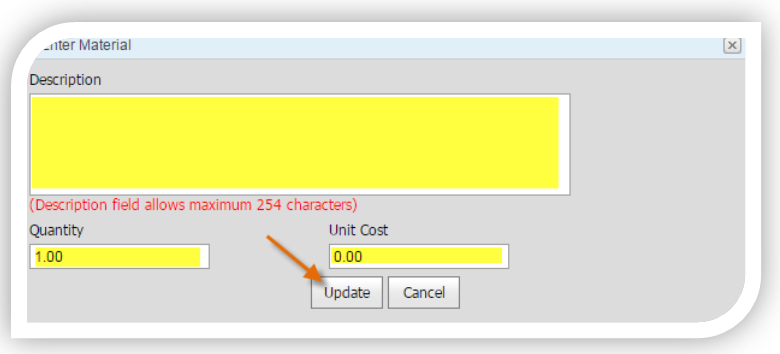
Note: Materials is also a miscellaneous field. If you are billing for a job and it is one set price with no breakdown, you can bill under this field. You will then need to breakdown the information under “Description of Work Performed”.
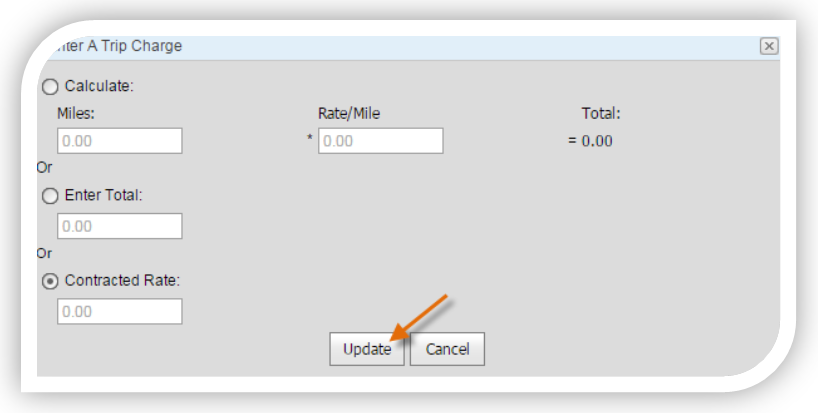
Invoicing – Entering Job Costs – Trip Charge
Trip Charge
- Choose “Calculate” to enter your rate per mile
- Enter the “Rate/Mile” cost
- Choose “Enter Total” if entering a flat rate
- Then click “Update”
Invoicing – Attaching Documents
Many clients require that an attachment (usually a manager sign-off and or store stamp) must be on the Work Order in order to submit the invoice.
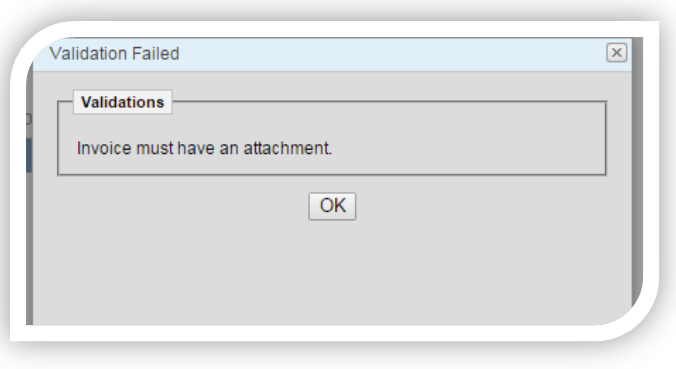
If a file is required and not attached to the invoice when you are attempting to submit it, a “Validation Failed” pop-up box will appear.
To attach a file you will click on the paper clip in the upper right hand side on it.

You Have 2 option on how to upload a file by choosing a file to upload or drag and drop the file from your computer:

To Download or view attachments click on the Paperclip (Now with a dot on it indicating their is an attachment, select “View File” or "Download File" next to the file you wish to view/download:

Note: at this time you are not able to delete documents once uploaded email training@facilitysource.com to have that that item deleted.
Note: Each File can now be up to 5MB a piece in size and the name of the file MUST be 30 characters or less
Submit Your Invoice
From the “Invoice” screen be sure to click the Save icon to be sure the entries are not erased. This will also populate the “Actions” dropdown list and allow you to submit the invoice for payment.

Select the “Submit Invoice” option and the status will update to Pending Client Invoice Approval, Pending Work Verification or Pending Invoice Exception Approval.

Related Articles
Quoting on fmPilot 2
If the technician finds additional work is needed or the DNE is not enough to cover the cost of the job, you will submit a quote in the system. after you log in, you will be brought to your Vendor Directory, under Client click on the Client you ...Work Order Status Flow Chart
https://fmpilot.zendesk.com/hc/en-us/articles/202758330-Work-Order-Status-Flow-Chart